Auxiliary feeder usage tutorial and troubleshooting
SV08 max uses an auxiliary feeder, which drives the gears through an independent motor and actively pushes the filament to the extruder, making it easier to install and unload the filament. It can also detect filament breakage, blockage, and entanglement, avoiding wasting more filament during printing.
Before using the auxiliary feeder, please confirm that the printer's firmware is updated to the latest version.
¶ How to use the auxiliary feeder
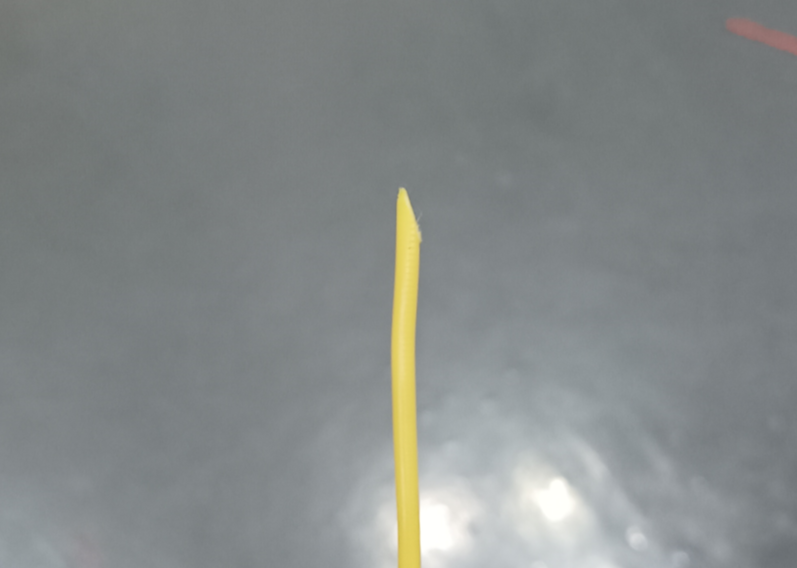
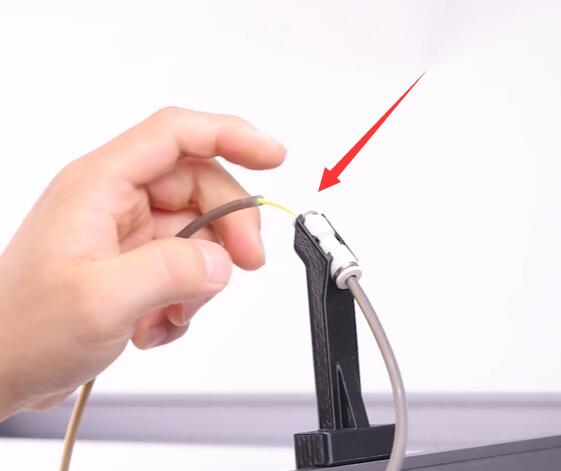
Installation of the filament: Cut the filament at a 45° inclined angle for easy installation of the filament.
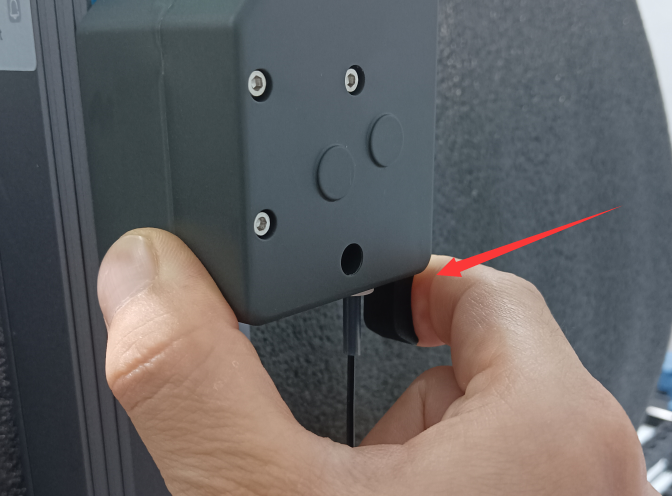
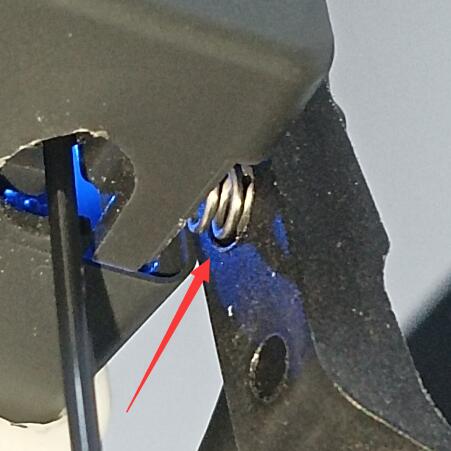
Press the handle of the auxiliary feeder, load the filament, and check the indicator light of the auxiliary feeder to make sure the broken material detection has sensed the filament
 |
 |
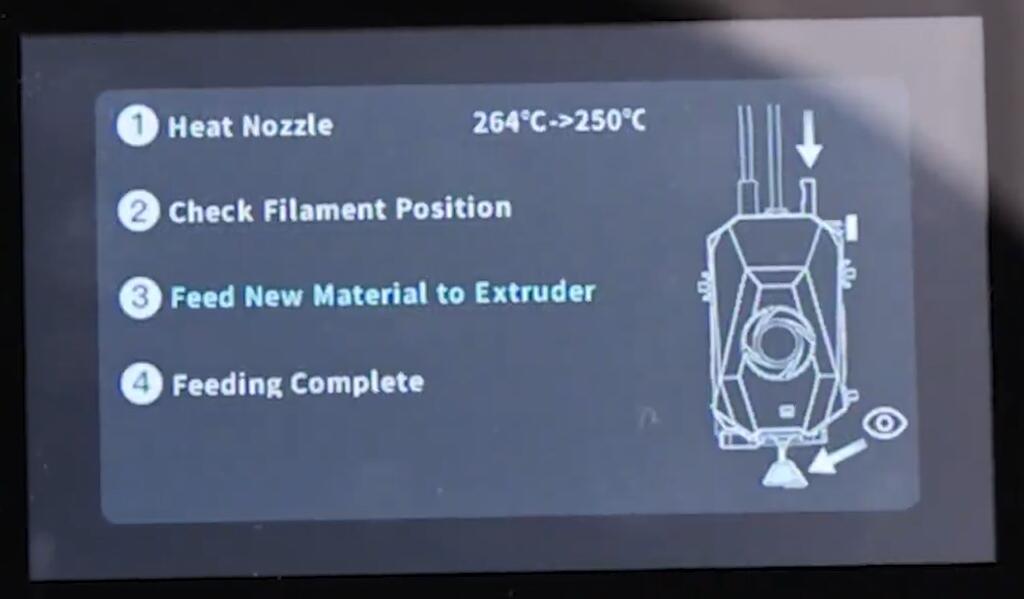
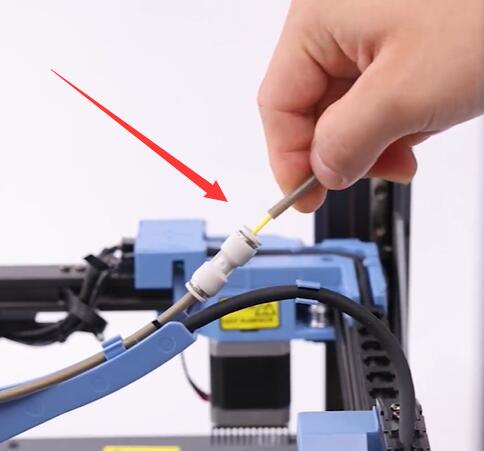
Confirm that the filament has successfully entered the Teflon tube, click the switch of the auxiliary feeder, and the filament is delivered to the extruder head to complete the installation of the filament.
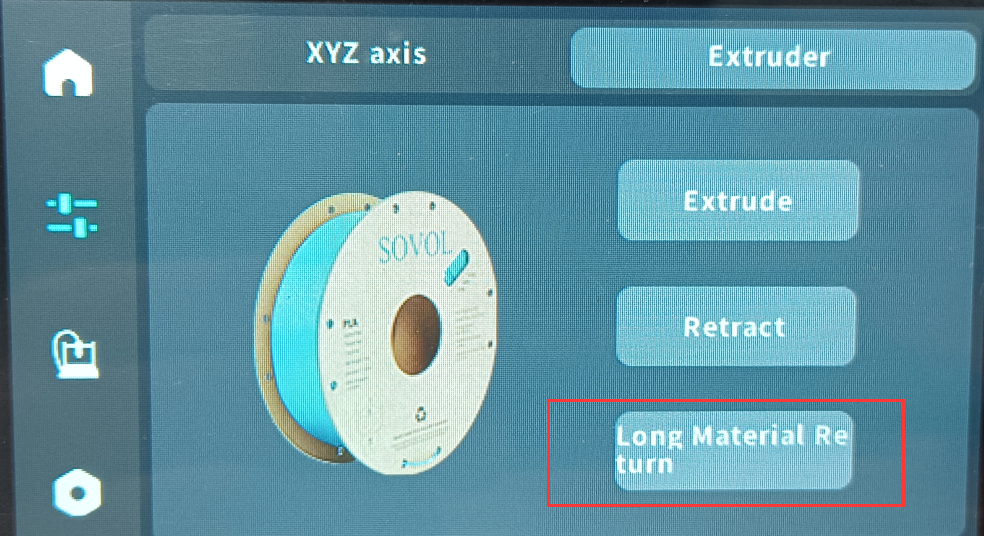
Unload the filament: Click the long unloading button, the nozzle will automatically unload the filament after heating is completed, and wait for the filament to exit before pulling out the filament.
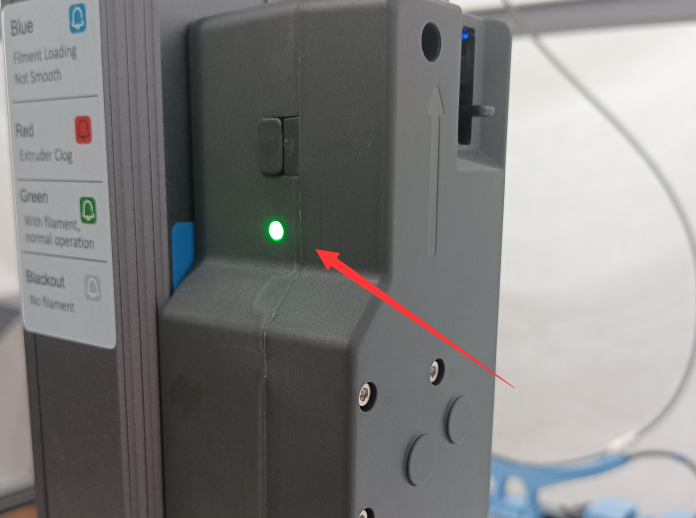
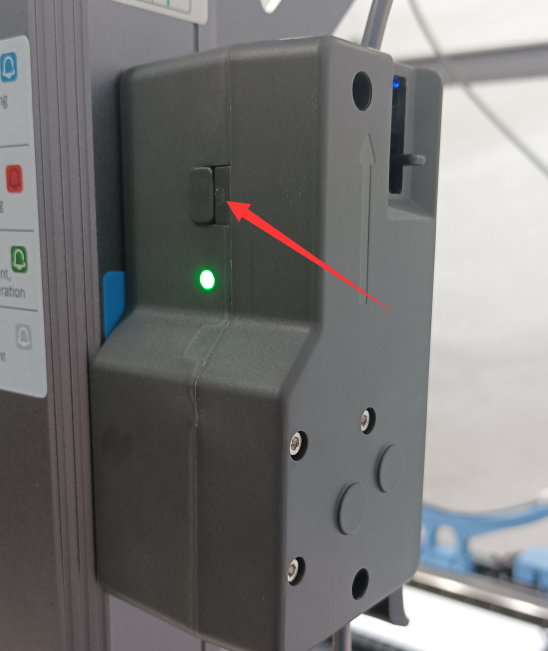
¶ Light indication:
1. No light:
No filament loaded.
2. Green light:
Filament loaded, filament transported normally for printing.
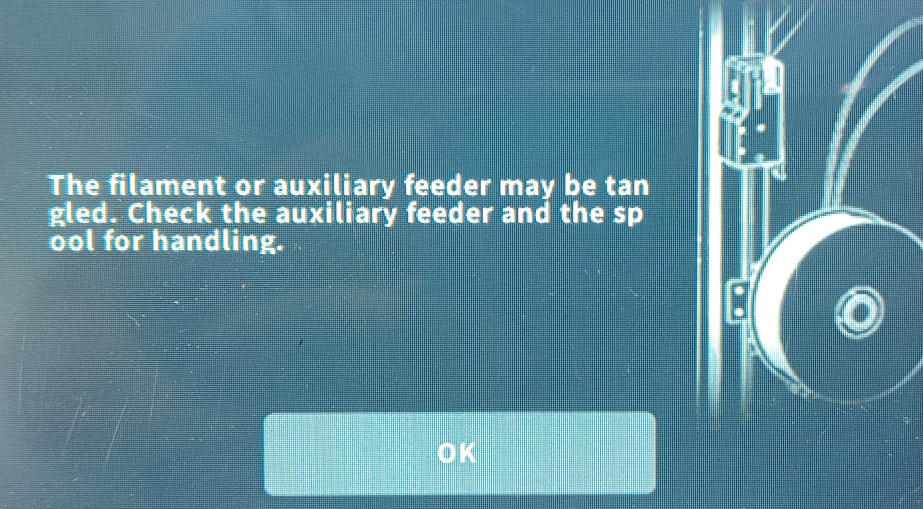
3. Blue light - filament entangled:
(1) The photoelectric switch is not activated, the spring does not rebound upward, and the discharge tube is stuck.
(2) The feed handle spring is loose, causing the filament to fail to feed properly.
(3) The Teflon tube has detached from the pneumatic connector, which preventing the filament from being properly fed into the extrusion head.
(4) The filament is entangled and cannot be printed normally.
(5) The filament is used up and needs to be replaced with a new filament (it takes 5-8 minutes to trigger this situation).
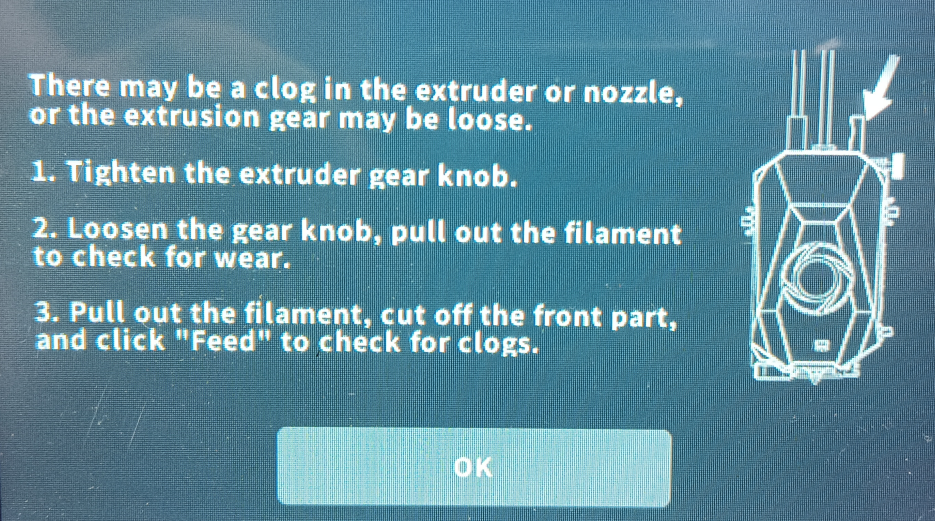
4.Red light - nozzle blockage, etc.:
(1) Nozzle blocked/thermal creep occurs/filament diameter issues prevent proper melting and extrusion.
(2) The extruder handle is loose, causing uneven gear marks on the filament.
(3) The discharge tube is stuck and the photoelectric switch cannot be triggered downward.
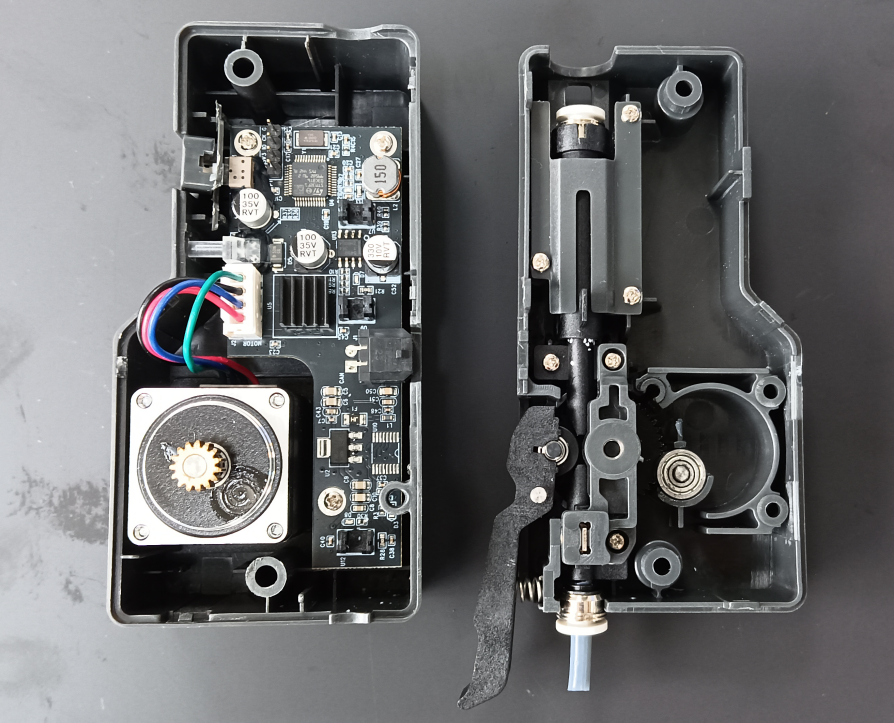
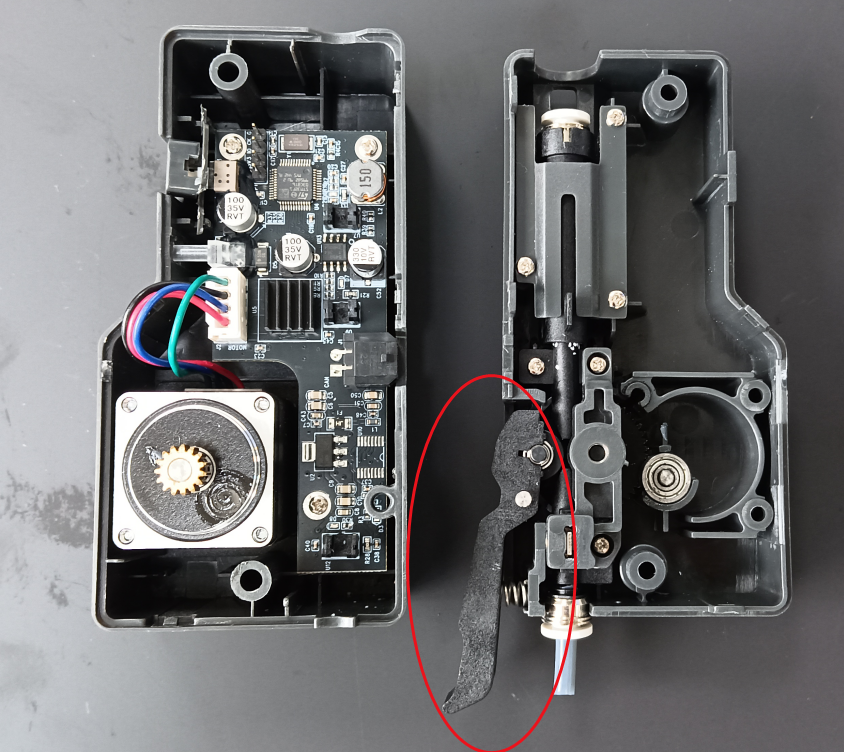
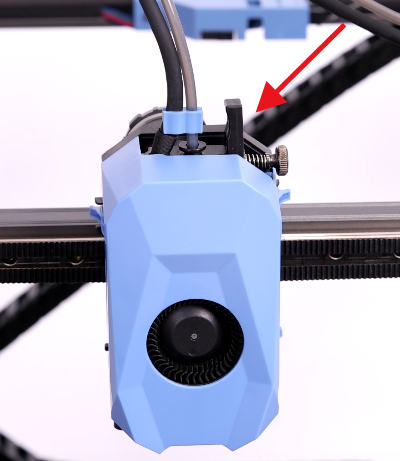
¶ Internal structure picture:
¶ Troubleshooting:
An error occurs, as shown below:
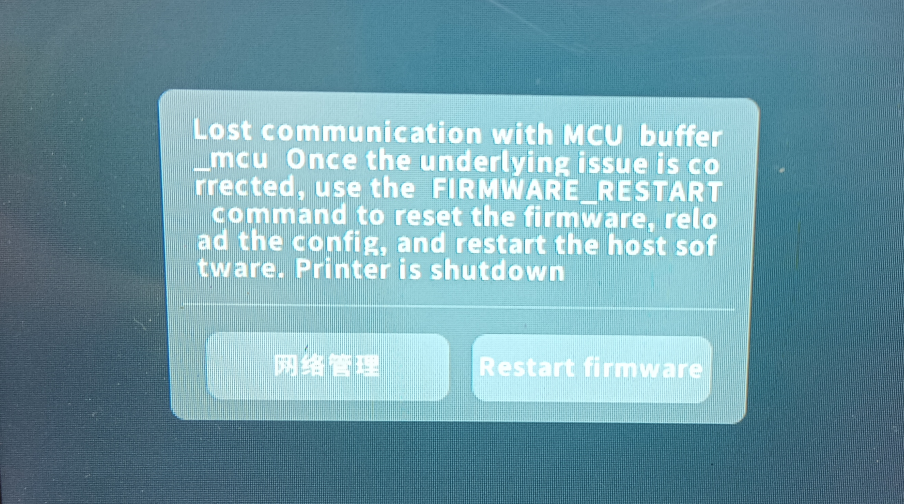
Please check the wiring of the auxiliary feeder, if the cable is detached or damaged, it will be prompted to report an error, you need to confirm that the cable is successfully connected to restart the printer.
¶ Blue light
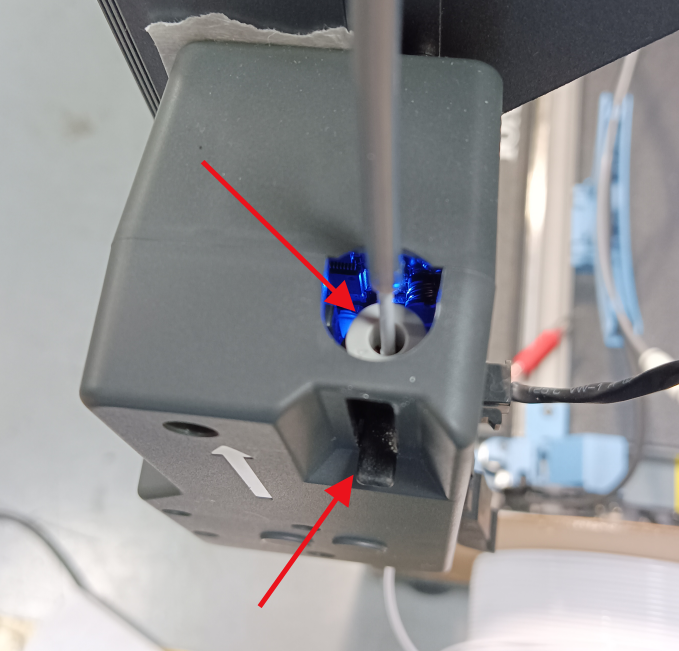
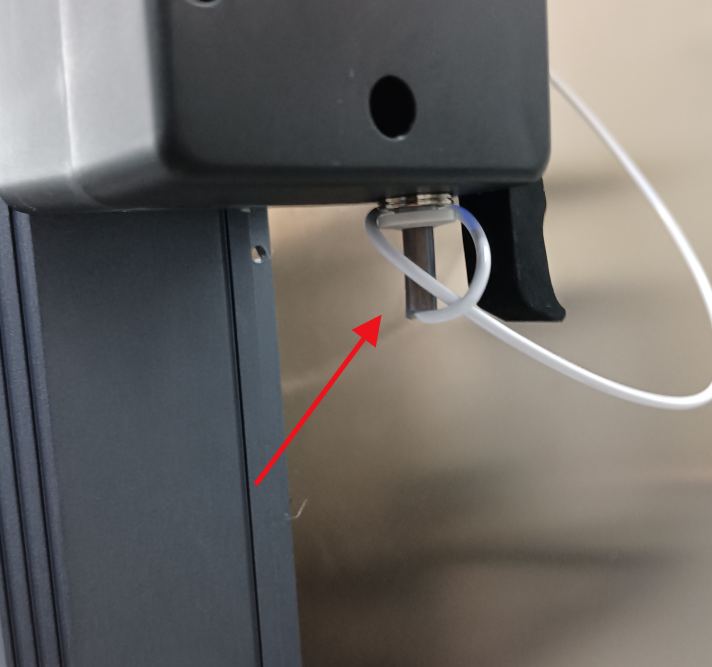
(1) Check the discharge pipe and spring, move the discharge pipe up and down, and confirm that the spring and discharge pipe are not stuck.
(2) Squeeze the handle of the auxiliary feeder to confirm that the handle spring of the auxiliary feeder is not detached and the filament is feeding properly.
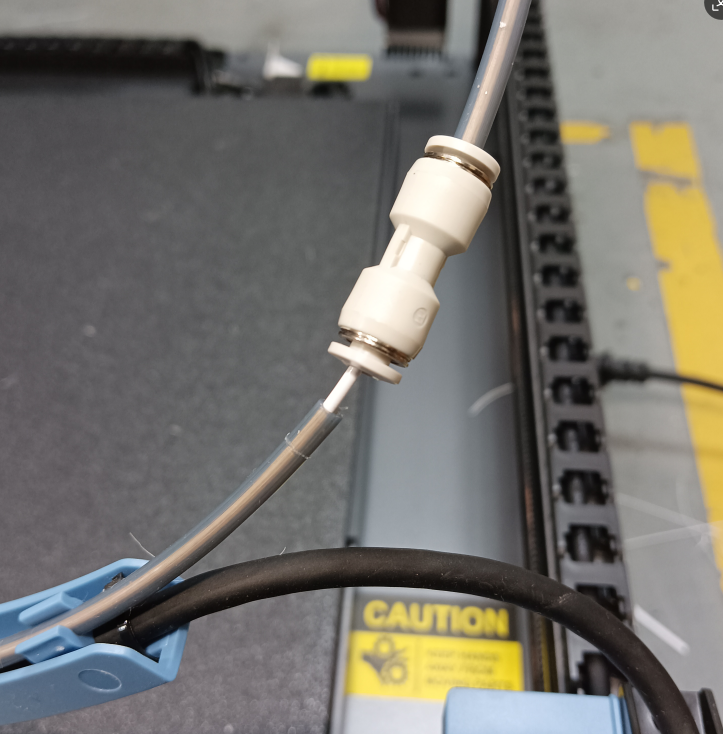
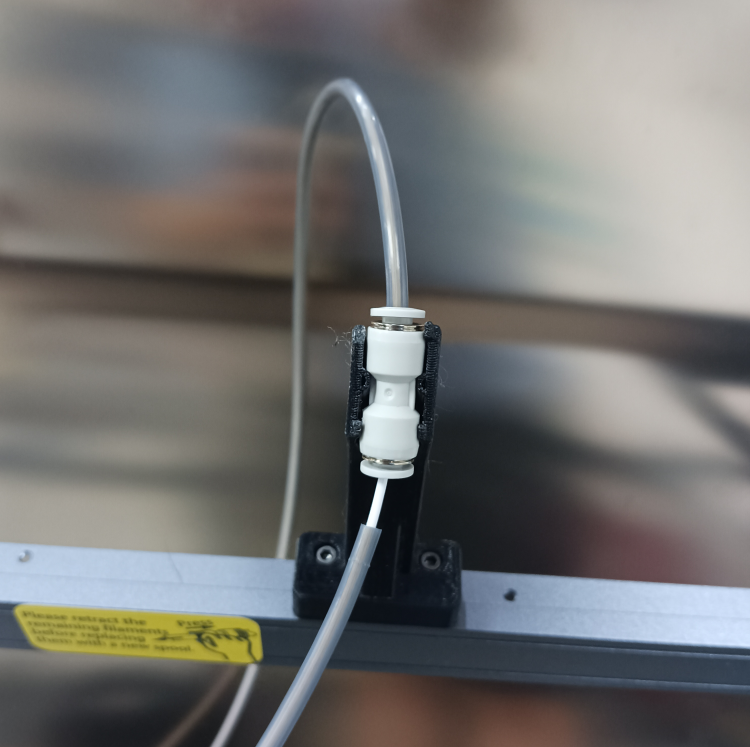
(3) Please check the Teflon tube and pneumatic connector. If they are loose, please connect them in time.
 |
 |
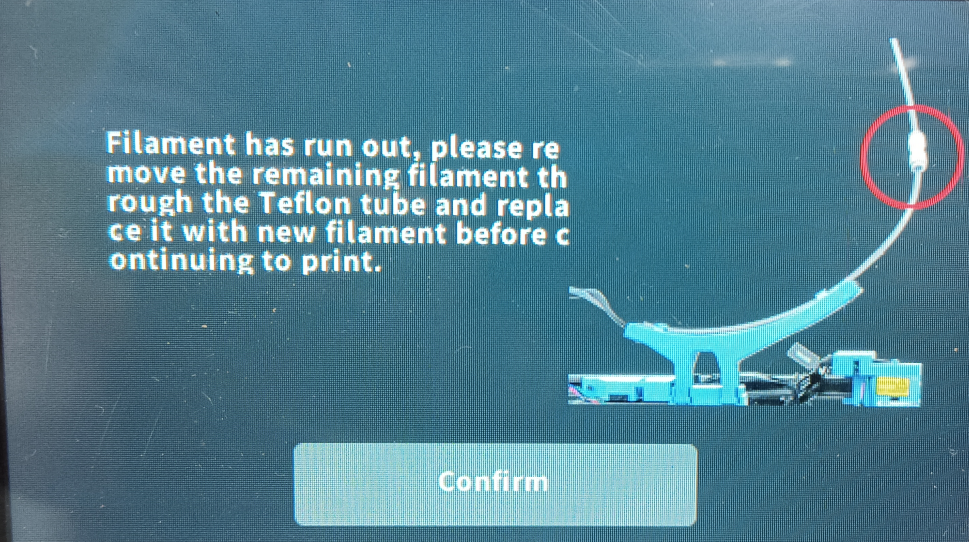
(4) Check the filament and make sure it is not tangled or knotted. After the printer completes the long unwinding process, store the filament in time to avoid entanglement. If the same roll of filament is entangled multiple times, try to replace it with another filament and print again.
(5) After using the filament, please replace it. Please refer to the video tutorial on replacing the filament:
¶ Red light
- Check the model being printed. If the model's internal filler or walls are very porous and have holes, this means the filament is not moving in the auxiliary feeder, Teflon tube, or throat tube, causing the red light to appear.
- Click on automatic feeding and observe the nozzle. If the filament appears in the nozzle, refer to steps ①-④. If the filament does not appear, refer to steps ⑤-⑥.
 |
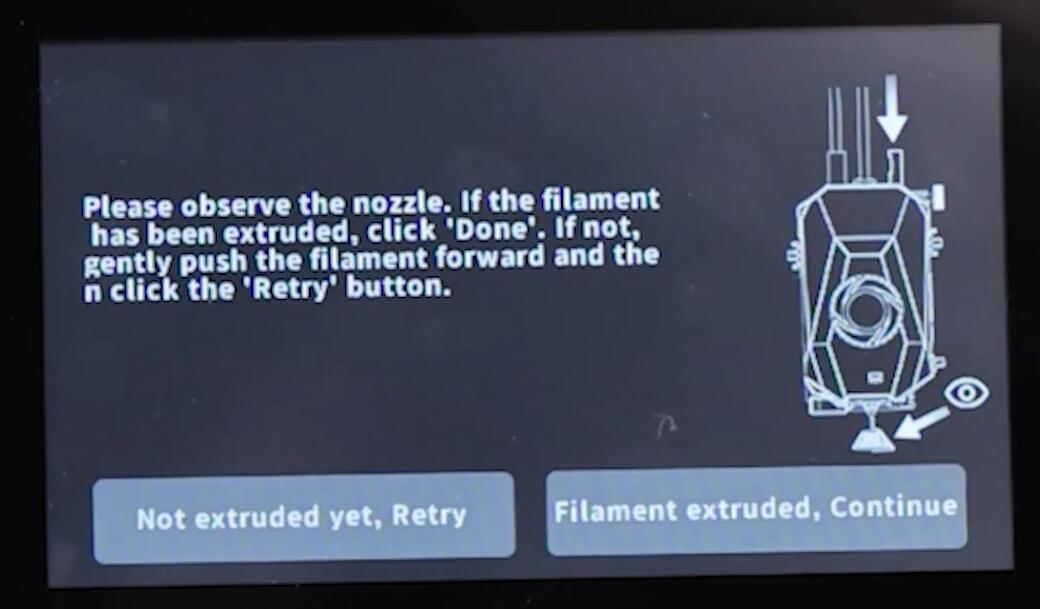 |
¶ Filament can be extruded:
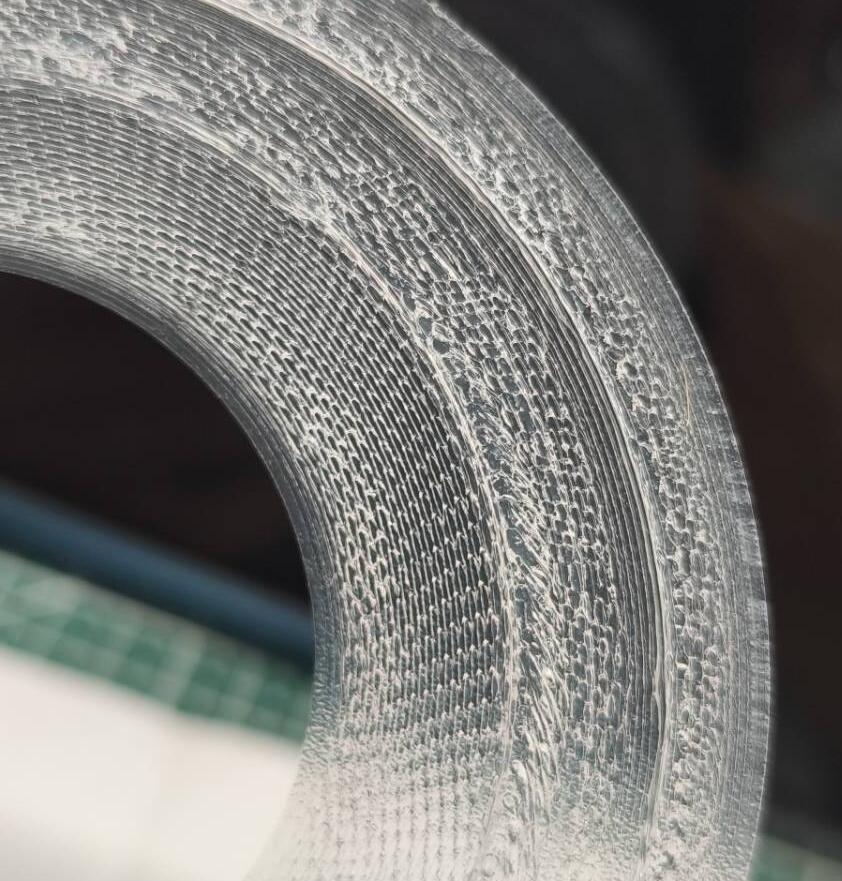
① Check the slicing parameters and filament material. If the extruded filament shows tip expansion or uneven extrusion marks, thermal creep has usually occurred. Please check the current slicing temperature and select an appropriate printing temperature to avoid overheating and thermal creep causing blockage.
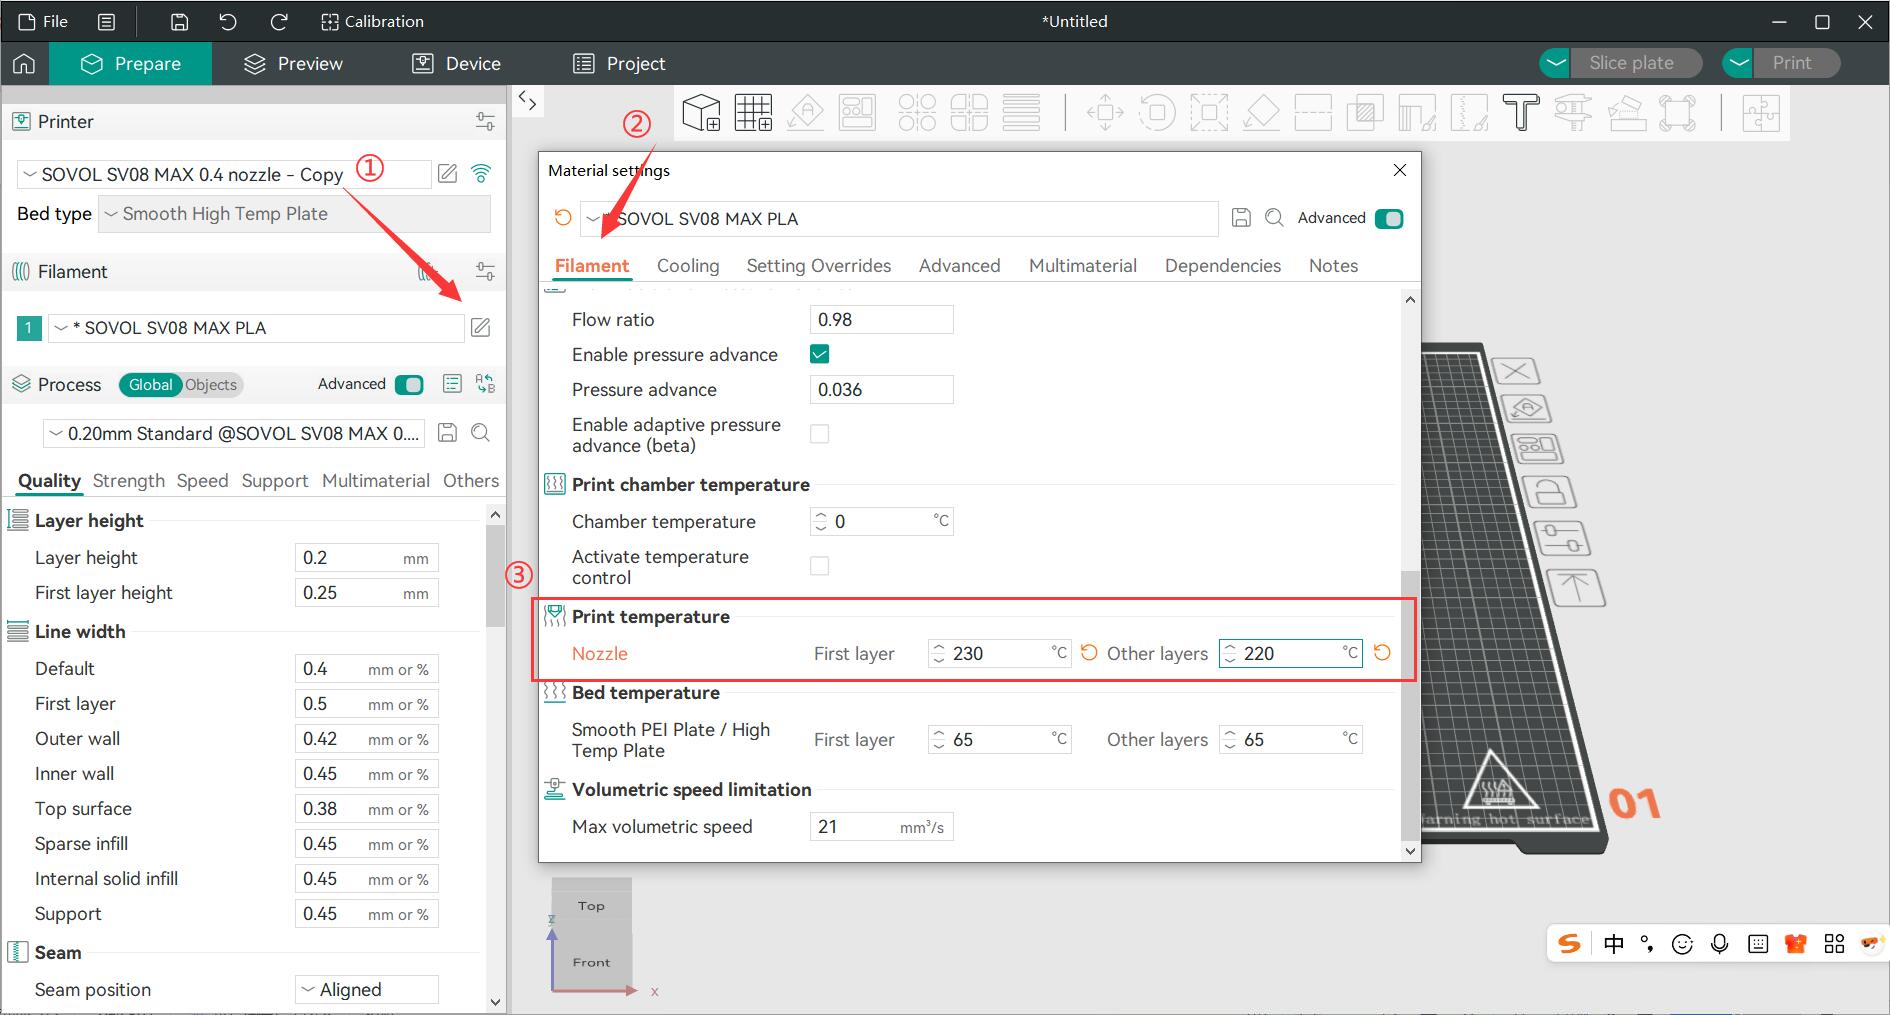
Our preset slicing parameters are based on data tested with SOVOL filaments. If you change to a different filament, please modify the parameters accordingly.
Reducing the print speed by 20% and increasing the nozzle temperature by 5-10°C in Orcaslicer can resolve most cases where filaments cannot print at high speeds.

② Please try different types of filaments for testing, and confirm that the wire diameter of the consumables is within ±1.75mm. It is recommended to use high-speed consumables for printing.

③ Remove the Teflon tube from the connector and pull the filament. If significant resistance is encountered, clean the dust or filament debris from the connector and Teflon tube.
Check the Teflon tube's orientation to avoid tangling or bending, which can cause excessive resistance.
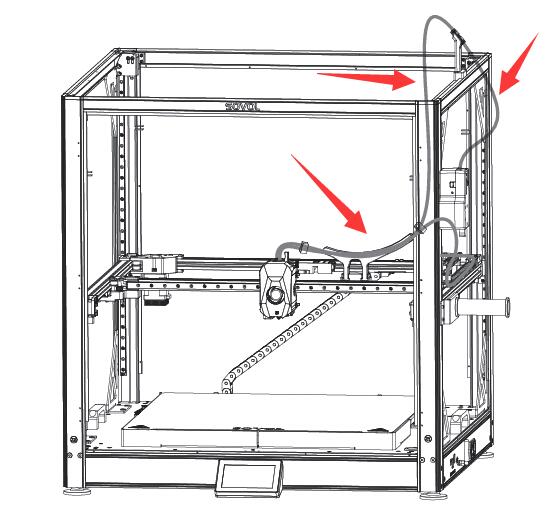
④ Inspect the Bowden connector and Teflon tube. Remove the Teflon tube and pull the filament to ensure smooth filament movement. If significant resistance is encountered, check and adjust the direction.
 |
 |
¶ Filament not extruded successfully:
⑤ Inspect the nozzle and throat. Heat the nozzle to 240°C, remove the Teflon tube, and open the extruder handle. If the consumable cannot pass through after insertion, it indicates nozzle blockage or thermal creep. Please refer to the cleaning tutorial video: https://youtu.be/zIimdq_HCjE?si=kNH4Xb7tfztmDwSe
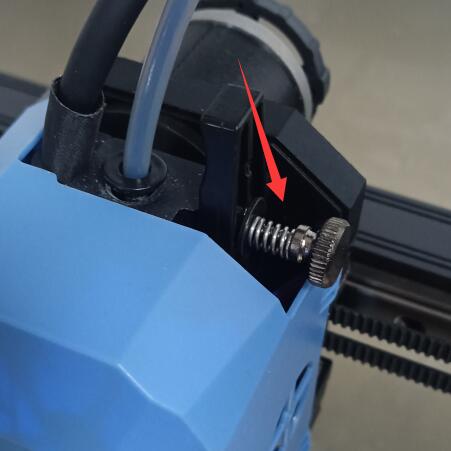
⑥ Inspect the tool head handle and auxiliary feeder handle. Ensure the auxiliary feeder handle spring is not missing. Adjust the hand-tightening nut to obtain appropriate spring tension and ensure the consumable can be extruded normally.
 |
 |
¶ Internal troubleshooting
1. Check the Bowden Tube Connector. Ensure the connector is securely fastened to the Teflon tube. If it is loose, the filament will not feed into the tool head synchronously, causing the auxiliary feeder to display an error and pause printing.Please refer to the disassembly video: https://youtu.be/nEvPbByr3Vc?si=avsWKx1-lsxD0rI_&t=116

2. Check the pneumatic connector to ensure there is no filament dust inside the pneumatic connector and Teflon tube. Filament dust originates from the metal sheet. Burrs on the metal sheet can cause filament wear. Clean the filament dust and polish the metal sheet until smooth. If this does not work, please contact SOVOL.