SV06 ACE Orcaslicer import configuration file (Windows)
1、Find the download link of Orcaslicer in Github,Download the exe file that suits your current version on your PC.
Link:https://github.com/SoftFever/OrcaSlicer/releases/tag/v2.2.0-beta
/image1.png)
/image2.png)
2、Install the Orcaslicer, software according to the prompts.
/image3.png) |
/image4.png) |
3、Open Orcaslicer, click "Help" "Show Confiquration Folder" and delete all files in the OrcaSlicer folder under this path. (Note: the previously added machine configuration will also be deleted. Please export the configuration before deleting the folder. Please refer to step 5 to export your configuration file.)
/image9.png)
4、If you cannot open the configuration folder this way, please Open the location of the file under the installation path of Orcaslicer,
find \Roaming\OrcaSlicer , and delete all files in the OrcaSlicer folder under this path.
/4.jpg)
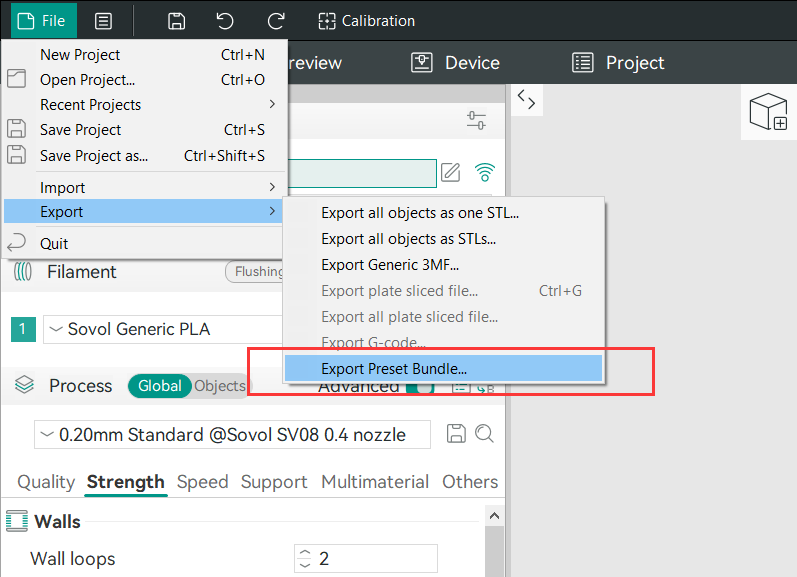
5、How to export the configuration file: Click "File" "Export" "Export Preset Bundle", select "Printer config bundle (.orca _printer)" and the model to be exported to complete the configuration file export.
/image11.png)
/image12.png)
5、Open the "resources" directory under the "OrcaSlicer" directory
6、Open the "profiles" directory under the "resources" directory.
/6.jpg)
7、Copy the contents under the "Orcaslicer Windows“directory in the materials to the "profiles" directory.
/image7.png)
8、Click "Replace the files in the destination"
/image8.png)
10、Reopen OrcaSlicer, search for "Sovol", and select the machine model want to add
/image13.png)
11、If the filament or model is not found, please return to the previous step and select Generic klipper Printer, then select the corresponding Sovol/Comgrow printer model, and click Next.
/image14.png)
12、Add Generic filament and complete the setup
/image15.jpeg)
13、Click Prepare to enter the main interface of the slicing software and switch to the printer model you selected
/image16.png)
14、Complete the Orcaslicer installation